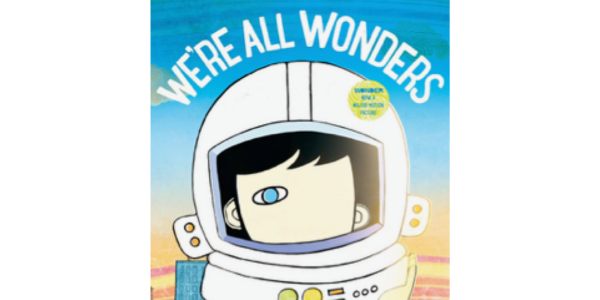
Blogs

Author: Parent Living

MOTHER'S DAY POP-TOP PLEASURES
MATERIALS14 oz Can with TabCandies for FillingTissue PaperDouble-Sided TapeHot Glue GunDecorative PaperRibbonRulerScissors  INSTRUCTIONSOpen the bottom of your can with a can opener If your opener cuts into the bottom of the can, leave it connected at one point If your opener removes the entire bottom and the rim, remove it completely Wash and dry your cans Fill can with candy Leave a half-inch space at the bottom Fill this extra space with tissue paper Use the glue gun to glue the bottom back onto your can It is okay to be a little messy at this point Be careful not to burn yourself or cut yourself on a sharp edge Once the glue is dry, the excess can usually be carefully rubbed away Cut a strip of decorative paper the same height as the can Adhere it to the can with double-sided sticky tape Cut 3 different ribbons 7” long Tie onto the Pop-top Download these labels from our website, or create your own Attach tags to the front and rear of the canTip: Many different candies can be placed inside. Try M&Ms,  Chocolate Covered Almonds, or Peanut Butter Cups.Download Labelshttps://www.dropbox.com/scl/fi/ggduhiaxz76pfkdfoacv1/mothersdaytinlabels.pdf?rlkey=td8koe5r2f72crbglf78al58d&e=1
Read More
MOTHER'S DAY STRAWBERRIES
INGREDIENTS Strawberries Melting Chocolate (White and Brown) Sprinkles Decorating Tubes Filled with Colorful Frosting Waxed Paper  DIRECTIONS Melt melting chocolate according to directions. Have your sprinkles ready, because they stick best to the chocolate while it’s still warm. We placed the sprinkles in a wide mouthed cup. Sprinkled StrawberriesDip your strawberries in the chocolate. Immediately after dipping, hold strawberry  over the wide mouthed cup and distribute sprinkles.  Extra sprinkles will fall back into the cup and can be used again. When desired effect is reached, place your strawberry on waxed paper to dry. Striped StrawberriesDip strawberries in the melting chocolate.  Place on waxed paper.  Use decorating tubes to stripe the frosting back and forth over the strawberries until desired effect is achieved. Try yogurt coating as an alternative to chocolate.
Read More
COOKIE DOUGH HEART
INGREDIENTS Packaged Sugar Cookie Dough 8 ounces strawberry flavored cream cheese spread 8 cups assorted fresh fruit, washed and sliced Rolling Pin Baking Stone or Cookie Sheet  DIRECTIONS Using a rolling pin, roll cookie dough into a thin sheet on your baking stone or cookie sheet, about ¼-½ in We used a large heart cookie cutter to shape the heart  You can also  just shape it into a heart Bake according to the directions on the package.  Allow to cool completely Spread the cream cheese in a thin layer over the surface of the cookie Layer the fresh fruit over the frosting in whatever pattern you desire  If desired, cover fruit with a light coat of ¼ cup apricot jelly mixed with 1 Tbsp water using a pastry brush. Combine the jelly and water, and microwave for 30 seconds. Stir until the jelly is smooth. Use a pastry brush to glaze the top of your fruit. This prevents the cut fruit from looking wilted.
Read More
SUMMER SPLASH FLIP FLOPS
MATERIALS Inexpensive flip-flops 300 water balloons  INSTRUCTIONS Place 3 water balloons in the same direction and tie them together with the fourth balloon. Continue with the fourth balloon, double knotting it onto the flip-flop strap.Repeat until each flip-flop strap is covered. Balloons can  easily be slid up and down the strap until the desired  amount is achieved.We used approximately 150 water balloons per flip-flop These are great conversation starters  at any beach day! These are great conversation starters  at any beach day!
Read More
WE'RE ALL WONDERS
Activity 1: Empathy Mirror  Ages: 3 - 6  Skills Developed: Self-awareness, emotional intelligence  Materials Needed: A handheld mirror, markers, and paper  Instructions: Have children look in the mirror and describe something special about themselves. Then, ask them to think of something special about a friend or family member and draw a picture of that person. Discuss how everyone has unique qualities that make them wonderful.  Activity 2: Kindness Jar  Ages: 4 - 10  Skills Developed: Social-emotional learning, teamwork  Materials Needed: A jar, slips of paper, markers  Instructions: Decorate a jar and label it "Kindness Jar." Have children write or draw small acts of kindness on slips of paper (e.g., "Help clean up after dinner," "Say something nice to a friend"). Every day, encourage them to pick one act to complete. At the end of the week, celebrate their efforts!  Activity 3: Superhero SelfPortraits  Ages: 5 - 11  Skills Developed: Confidence, creativity  Materials Needed: Construction paper, markers, scissors, glue  Instructions: Ask children to draw a selfportrait, but with a twist—they get to design their own superhero outfit! What makes them a "wonder"? Do they have a superpower related to kindness, like spreading smiles or helping others? Let them present their superhero to the group.  Final Thoughts  These activities help children embrace differences, practice kindness, and see the beauty in themselves and others. By integrating *We're All Wonders* into interactive learning, families can foster a culture of empathy and understanding that lasts far beyond storytime. Book Citation:  Palacio, R.J. *We're All Wonders.* Alfred A. Knopf, 2017.
Read More
BACK TO SCHOOL PICTURE FRAME
MATERIALS 4” x 6” Flat Wood Frame 16 Pencils (You may want extras in case you break one or your frame requires more) Pencil Sharpener Small Hack Saw Foam Brush  INSTRUCTIONS White Lined Paper Mod Podge Exacto Knife Hot Glue Red Cardstock (apple snapped) School Picture Lay your pencils on your frame and mark where you want the end to be for each—using the frame’s corner seams as a guide. Cut off the extra with a small hack saw and then sharpen the pencils to a point until they all fit perfectly on the frame. Brush a light coat of Mod Podge over your frame and lay a sheet of lined paper over it, smoothing over the front of the frame. Mod Podge the edges of the frame and wrap the paper around the corners like a present. Mod Podge the paper around to the back of the frame so the sides look nice and finished. Cut an X in the paper, in the middle of the frame (see photo), with your exacto and fold the paper onto the inside edge— adhearing it with Mod Podge. Trim off any excess paper. CAREFULLY hot glue each pencil in place by placing 3 to 4 small dots of hot glue to each pencil as you lay them down. Attach the cardstock apple using hot glue (see photo).
Read More