Blogs

Author: Parent Living

CHALKBOARD MASON JARS
Looking for a simple, creative way to dress up mason jars for Valentine’s Day? This chalkboard craft is fun to make and easy to personalize.MATERIALS 1 Mason Jar Painter’s Tape Sharp knife Black Chalkboard Spray Paint White & Red Acrylic Paint Q-tips Metal-rimmed tag Red & Black Sharpie® Markers Chalk Twine Sweethearts Candies  INSTRUCTIONS Place a strip of painter’s tape on the jar and draw a heartUsing your knife, cut around the heart and remove the excess tape, leaving the heart taped to the jarSpray paint the jar using the chalkboard paintAllow to dryUsing a q-tip, make a red-and-white-dotted heart around the window frameUse chalk to draw a curly heart on the jarDraw a heart with Sharpie markers on the tag and tie it to the jar with twineFill the jar with Sweethearts candies Tip-This jar could also be used as a candle.
Read More
VALENTINE CANDY BAGS
YOU'LL NEED 12-inch clear disposable decorating bag Red and/or pink curling ribbon ½ cup small multi-colored candies String ½ cup measuring cup Scissors Optional—gift tag, pen INSTRUCTIONS Scoop a ½ cup of candy into the bag. Use the string to tie the bag closed above the candy. Attach or tie the curling ribbon over the string. Optional—attach a gift tag to the curling ribbon and  address it to a friend or Valentine.
Read More
CANDY STICKS
YOU NEED ¾ cup vanilla candy meltsColorful sprinklesPretzel rodsMicrowaveable mug Spoon Paper plate Waxed paper  DIRECTIONS Spread 1/3 of the sprinkles onto a paper plate (you can add more sprinkles as needed to replenish what is used up). Follow the package directions to melt the candy melts in the mug. Dip one end of a pretzel rod into the melted candy to lightly coat 2/3 of the rod (you can use the spoon to scoop the melted candy around the rod as needed). Immediately roll the coated part of the rod in the sprinkles. Place the rod on a sheet of waxed paper to cool. Repeat this process for the remaining pretzel rods.
Read More
FLOWER POT WIND CHIMES
You NeedFour 2-inch diameter terracotta pots2 yards of juteLarge wood or plastic beads with holes large enough to thread on juteVariety of colors craft paint Variety of sizes paint brushesPaper plateScissorsDirectionsUse the paper plate as a palate for the craft paint. Use a larger brush to paint a base coat on the pots. Let dry.Use small brushes to paint simple designs or shapes on the pots: dots, stripes, bugs, flowers. Let the paint dry.Holding the ends of the jute together, tie a knot 2-3 inches above the ends of the jute. Unravel the ends below the knot.String a 6 inch length of beads on the jute. String a pot on the jute so it hangs upside down like a bell over the string of beads. Tie a knot in the jute just above the bottom of the pot. String another 6 inches of beads on the jute and add a second pot above the string. Knot the jute just above the bottom of the second pot. Repeat this until you have all four pots strung with beads between them. String 2-3 inches of beads above the top pot and tie a knot to create a loop for hanging the wind chimes. 
Read More
SHAMROCK COOKIES
YOU NEED Ingredients for your favorite rolled cookie dough Green food coloring Green sprinkles 1-2-inch heart cookie cutter Cookie sheet Rolling pin Flour 1 egg, beaten Small, clean craft paint brush Wire cooling rack Spatula  DIRECTIONS Prepare cookie dough according to your favorite recipe.  Add desired amount of green food coloring to the wet  ingredients before adding the dry ingredients. Chill. On a floured surface, roll the green dough to 1/8” thickness.  Use the cookie cutter to cut 4 hearts to make each  shamrock cookie. Overlap the points of 4 hearts in the center and press the points so they stick together and the hearts form a shamrock shape. Brush the top of the shamrock with beaten egg and sprinkle it with green sprinkles. Bake according to recipe directions—until the edges of the cookie begin to turn golden brown. Use the spatula to remove the cookies from the pan to the  cooling rack. Cool completely.
Read More
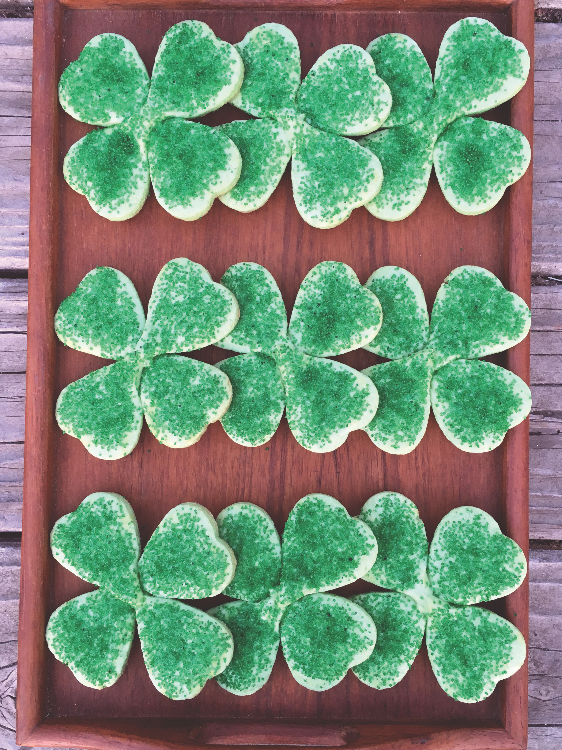
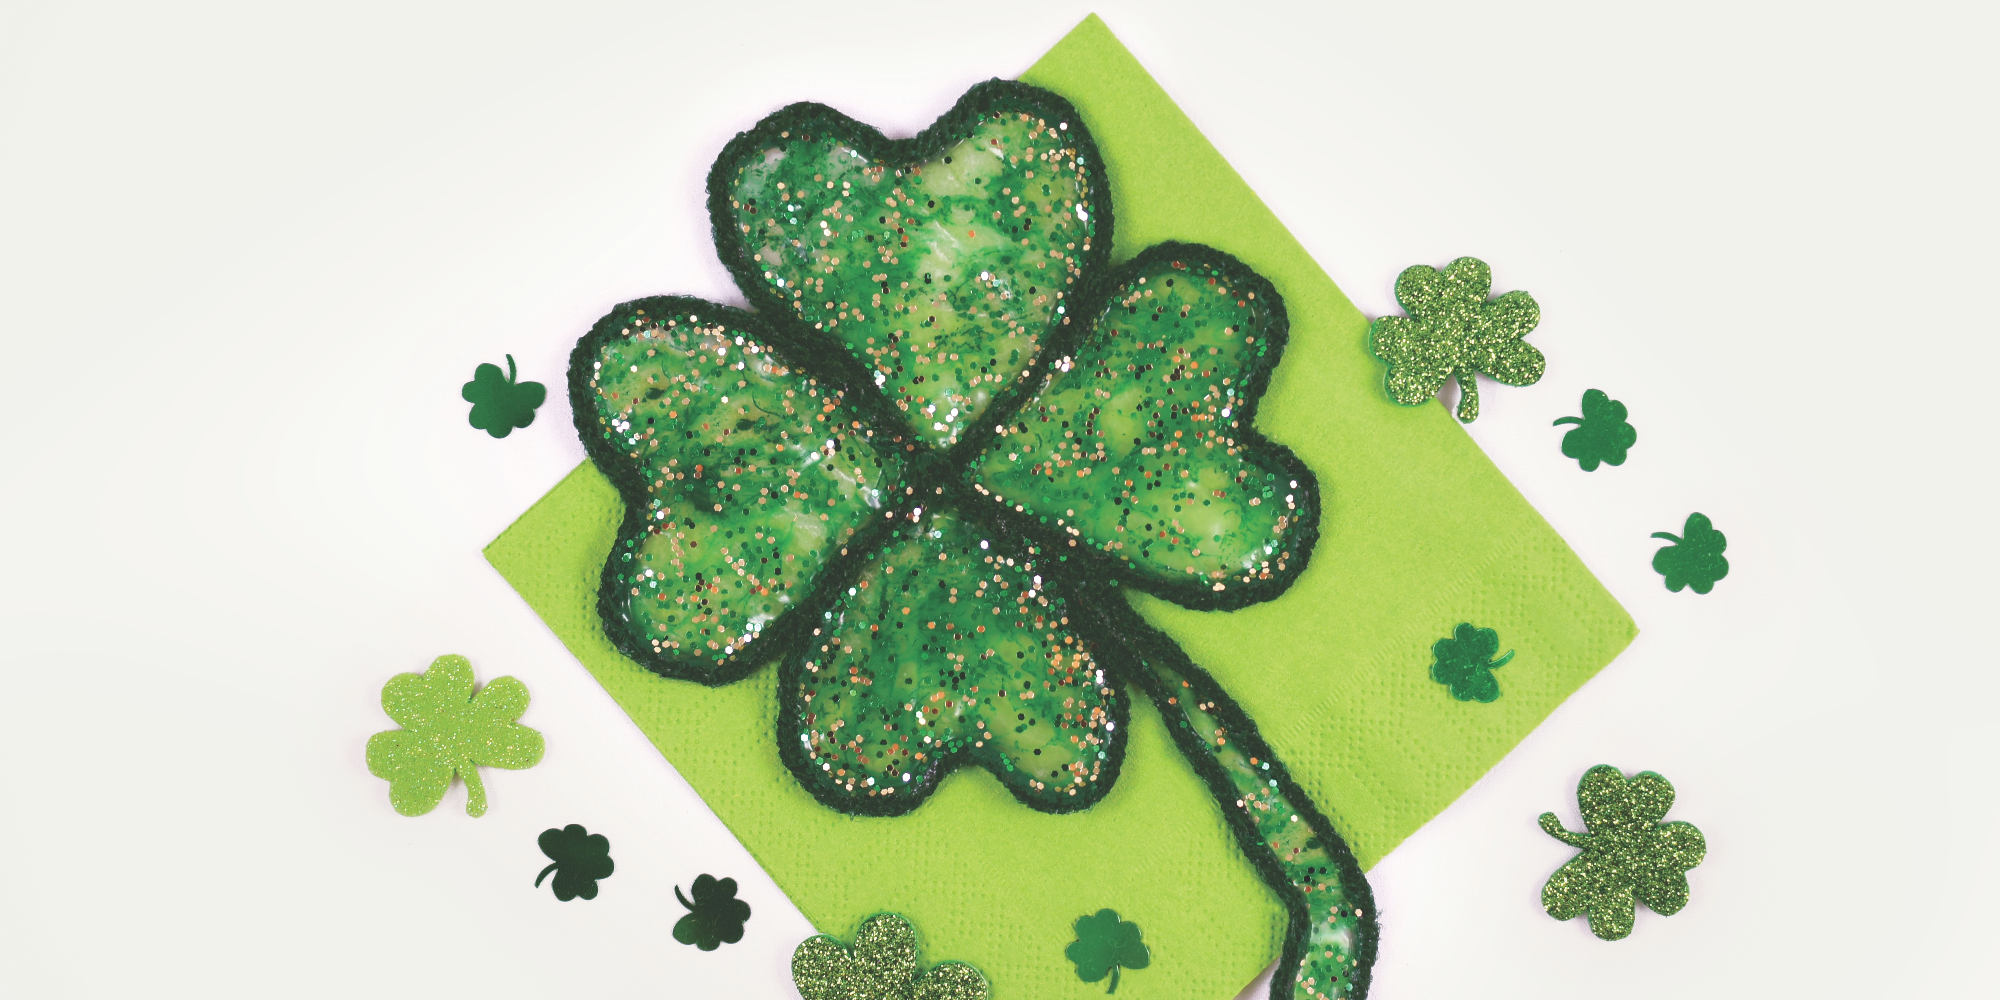
STAINED GLUE WINDOW SHAMROCK
MATERIALS Green Yarn Thread Needle Waxed Paper White Glue Paper Cup Green Paint (Watercolor ) Paint Brush Scissors Tape(Optional) Glitter  INSTRUCTIONS Draw out a four-leaf clover. Tape your drawing to the table and then tape a piece of waxed paper over your drawing. Measure and cut each section of string based on your template. Overlapping string just a bit will increase the overall strength of your craft piece when finished. Soak each piece of string in white glue. Pull the string out of the glue, removing excess glue using your thumb and forefinger. Lay down your string according to the lines of your template. Placing a touch of glue on the strings where they come together will help create a stronger bond. Let dry overnight or until thoroughly dry. Now fill in each section with a solid layer of glue. Then, before moving onto the next section, paint in a small amount of color. Repeat the last step for each section then let dry 24 to 48 hours. When completely dry, carefully remove the waxed paper. Be careful not to bend or break the joints. Using a needle, pierce a piece of thread through the glue at the top near the yarn long enough to make a hanging loop. Optional—After all the sections have been filled in  with white glue and you have painted in the green paint, you can sprinkle on a small amount of glitter to  enhance the look of your shamrock.You can spray on a clear  coat to protect the paint and bring out the colors .
Read More